7.29.2011

Summer art class: Georgia O'Keeffe-inspired flowers

{Artwork by Malayna}

One of my all-time favorite artists is Georgia O'Keeffe. I've loved her since I first saw her work back in high school. It seems like her work is on everything - calendars, notecards, t-shirts, coasters, umbrellas, etc., etc. Despite the over-saturation, I still love her style. She was one of the most important artists in the 1920s (and one of the only famous females). Because all of my art class students are girls, a Georgia O'Keeffe-inspired lesson is inevitable!

 {Lola is wondering if the flowers are edible…}

Before class started, I went out to my yard and cut some fresh flowers. I looked for simple shapes, and wound up using black-eyed susan and rose of sharon (both white and purple). I put a few of each in little vases and placed them on each work table. (Unfortunately, we were experiencing a heatwave in this area, so we weren't outside for class.) I had several books about O'Keeffe's work that the girls could look through for inspiration. We read Georgia O'Keeffe (Getting to Know the World's Greatest Artists). Some of the girls couldn't understand why she was only one of a few famous female artists, so we talked a bit about what girls and women were doing in the 20s. They thought it was very "unfair" (Malayna) that most of the famous artists we've heard about are men. I agreed!

{Busy at work!}

Before they sat down to work we talked about how O'Keeffe basically zoomed in on flowers and didn't necessarily include the entire flower on the page. I told them they should fill their page with the drawing and could even have the petals going off the edges. I first gave each girl a small piece of paper to do a trial drawing. I wanted to be sure they knew what I meant by filling the page with the flower. This was an important step, because some of them made their flowers teeny tiny, and it gave them the chance to practice drawing big. When the drawings were finished they used watercolors to fill them in. 


7.22.2011

Summer art class: little huts

I'm so glad I have creative friends! It helps when those creative friends are artists who have also taught kid's classes. My friend (and fellow MamaCita member) Diana Trout gave me the idea for this little hut project. It was perfect. Just the right amount of time, easily done with markers or paints or crayons or colored pencils…anything, really! We used markers and wallpaper scraps from sample books (for the roof). I got the books last year by calling a wallpaper store and asking if they had any books they were throwing away. They were happy to give me a bunch.

Before the class started, I cut two pieces of white paper for each child. One measured 5.5" x 17" and the other was 8" x 8". I used cardstock so the huts would be sturdy. I had the wallpaper books out so the girls could choose a sheet for their hut's roof.

We read the book My Painted House, My Friendly Chicken and Me, by Maya Angelou. I pointed out the patterns on the houses and we also looked around my house for patterns. There were lots! They even pointed some out that I hadn't noticed. There were patterns on the pillows, in the artwork on the walls, in the rug, and the curtains. They noticed subtle patterns, like the wood grain on the coffee table.


The first thing they did after reading was to take their long piece of paper and draw patterns on it with pencil. I find that sometimes drawing with pencil makes them slow down and really think about what they're doing. They each had a piece of scrap paper to practice patterns before drawing on their good paper. After the patterns were drawn they colored them in with markers. There were very detailed patterns and some very simple patterns. After the patterns were drawn and colored, the sheets were stapled together to make a circle.


When they finished their patterns, they worked on the 8" x 8" paper, which would be the ground for their hut. They could decorate these any way they wished. The third step was to choose a wallpaper sheet that would be used for the hut's roof, which they traced a large circle onto and then cut out. A long cut was made in the circle so that it could be stapled into a sort of cone shape.


We put them all together with tape - taped the hut to the ground, and the roof to the hut. Some girls chose to leave the roof loose so they could make furniture for the inside and play with the hut.


7.15.2011

Summer art class: drawing dogs

This week's class was very small. Lots of people on vacation or at camp. It was kind of nice to only have four kids to teach! Definitely a very different dynamic. This was a good project to do with a small group - it was very organized and the girls had to pay attention to each step.

The book we read for this class was Doggone Dogs by Karen Beaumont & David Catrow. I love the illustrations in this book. They're silly and exaggerated and had the girls laughing.


After the book, I gave each girl an 11x17 piece of paper with two lightly drawn lines - one in the middle going vertically and the other in the middle horizontally. I also had a piece so I could show them (along with explaining) the steps of drawing a dog. They each got a template for the head to get the size correct. I wasn't sure how well they'd do with the proportion of the entire dog without the template. I think that they would have been fine without it.


We went very slowly - drawing first the head, then the nose, the eyes, etc. I did it along with them so they had an idea of what it could look like. Fortunately, no one copied mine! That's always something I'm afraid of when showing a sample.

After the entire dog was drawn, they could paint. The only direction I gave for that was that no one could paint their dog all black. I was afraid that if they did paint all black, it would cover their pencil lines, and they'd lose their drawing. They did a great job! (The first one says, "I'm insane!" It's my dog, Lola.)


(Thank you to Kathy Barbro from Art Projects for Kids for the idea and instructions! Check out her website - lots of great ideas for art projects.)


7.08.2011

Summer art class: cooperation drawing

First art class of the summer! It was a hot one, but the girls were troopers. In hindsight, I should have had it inside (considering it was about 90 degrees at 9:30 am). I love the idea of having class outside, but sometimes the reality of it isn't so great. Heat, sun glare, bugs… I'm glad I have enough space inside to move it if necessary (we work in the dining room). My long-term plan is to expand my third-floor studio to include an art class space. There's room up there, but some of it is used for storage and we'd have to find space for all that stuff. Yard sale!

 {Ready for the first art class of the summer!}

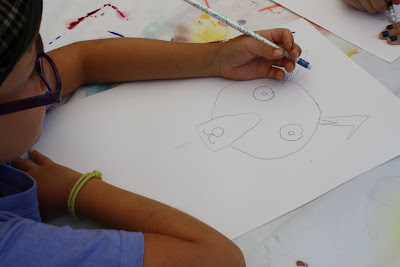
At the beginning of every art class, we start off with "free draw." I put out crayons and white paper (a ream of copy paper from an office supply store) on the tables and let them draw whatever they want while we wait for everyone to come to class. This gives the girls a chance to chat (not that they don't do it during class! There's always plenty of chatting.).

When all the girls are here, we read a book that has to do with the theme of that day's class. This week the book was "Friends" by E. Lewis (which I can't find online - weird). The book talked about cooperation between friends, which went perfectly with today's theme of cooperation drawing. After reading the book, the girls each got a 9x12 paper and a black crayon. They were to draw something on the paper, keeping in mind the design of the piece. They had 20 seconds to draw, then I would say, "switch" and they'd pass the paper to the girl next to them. This went on until all the girls had a chance to draw on each paper.

 {Drawing. It's hot!}

If I did it again, I would put more rules on the drawing. Maybe something like telling them what kind of drawing to do at each "switch" - rules, circles, squares, etc. As it was, the drawings were pretty much all over the place with no real design to them. But sometimes it's more about the process rather than the finished product!

 {Painting. We used tempera paints.}

When the girls got their original drawing back, they could then paint it. I gave them each three colors - red, blue and yellow. They could mix the colors if they wanted to, and most of them did.

{Completed paintings.}

We had some time after the paintings were finished, so I gave each girl a large piece of paper and some markers. I told them to write their name in cursive (if they coudn't, I did it for them). They either had to fill their page with one name, or with several versions of their name. Then they filled in the names with drawings, patterns and color. They really seemed to like this project, maybe more than the cooperation drawings! In their defense, it's hard to give your drawing over to someone else. Could you do it? I'm not sure I'd want to!

{Isabella's cursive name drawing.}

{Malayna's cursive name drawing.}